http://blog.the-it-blog.co.uk/2014/05/29/deploy-font-files-via-a-gp-group-policy/
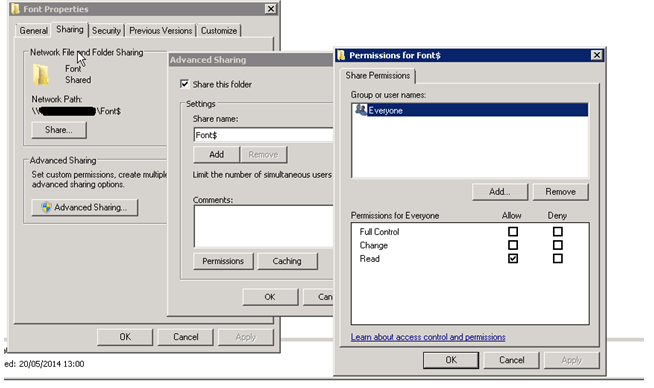
Create a network share on the server and allow everyone read all permissions
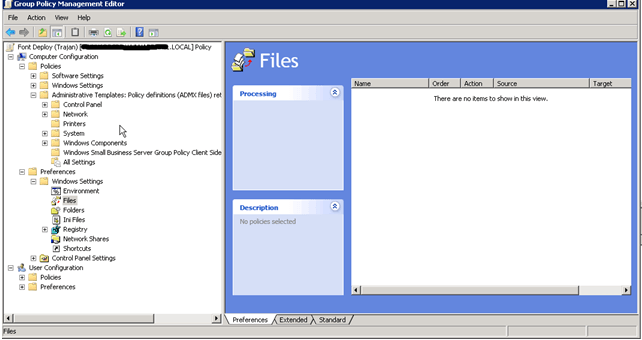
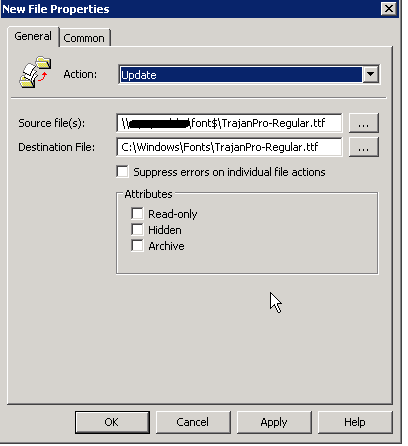
In the GPO go to Comp Config > Pref > Windows Settings > Files
Right Click Select New
Set action as “update” see here http://blogs.technet.com/b/grouppolicy/archive/2009/11/02/group-policy-preferences-colorful-and-mysteriously-powerful-just-like-windows-7.aspx for more info on what CRUD action to use
Now set your Source and destination file
Click OK
in the same GPO go to Comp Config > Pref > Windows Settings > Registry
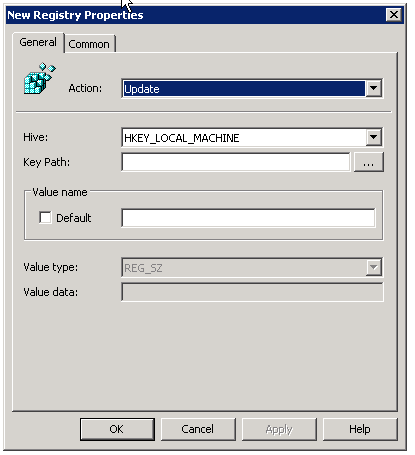
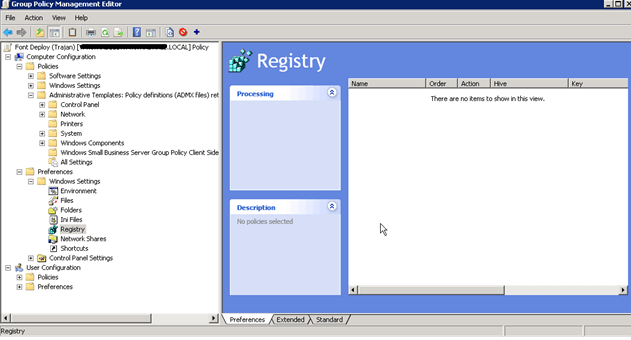 Right Click > New > Registry Item
Leave the action as update and leave hive as HKLM then in keyp ath go to “SOFTWARE\Microsoft\Windows NT\CurrentVersion\Fonts”
Now enter the value name for the font this is its name and if its an open type or true type to do this open the font and confirm
 now in the value data enter the file name
Click OK
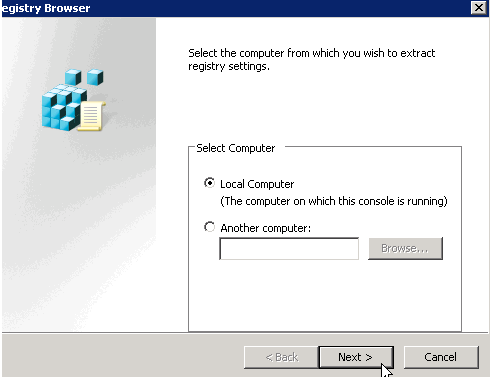
If your worried about what data to enter you can right click new in Registry and click Wizard (also install the font to the server before hand)
Click Local Computer and click next
Navigate through to the font in the registry using the same location as before
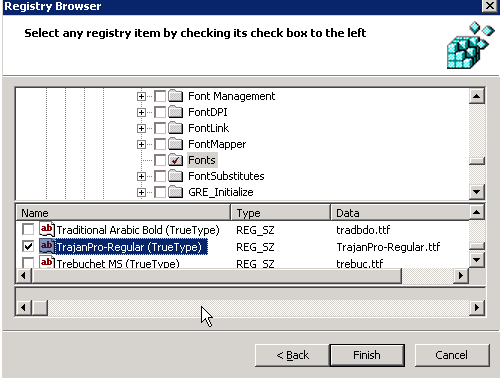
And click Finish
All settings will be created for you
Now either Test or deploy the font
Open Type
Code:
Hive: HKEY_LOCAL_MACHINE
Key Path: SOFTWARE\Microsoft\Windows NT\CurrentVersion\Fonts
Value name: OpenDyslexic-Regular (OpenType)
Value type: REG_SZ
Value data: OpenDyslexic-Regular.otf
Code:
Source file(s): \\SERVER\Share\OpenDyslexic-Regular.otf
Destination File: %WinDir%\Fonts\OpenDyslexic-Regular.otf
True Type
Code:
Hive: HKEY_LOCAL_MACHINE
Key Path: SOFTWARE\Microsoft\Windows NT\CurrentVersion\Fonts
Value name: fontname (TrueType)
Value type: REG_SZ
Value data: fontname.ttf
Specify the font files via a share:
Code:
Source file(s): \\SERVERNAME\Share\fontname.ttf
Destination File: C:\Windows\Fonts\fontname.ttf
Source http://www.edugeek.net/forums/windows-7/96317-installing-fonts.html
http://www.urtech.ca/2014/02/solved-how-to-deploy-fonts-using-group-policy/
Deploy fonts via GPO was to build an .MSI and then deploy the .MSI
Building the .MSI for the Fonts
1 – Get the Registry Settings
- Manually Install the fonts in question on your own PC (because it is much easier to copy the registry entries than it is to type them )
- Launch RegEdit and expand to
- HKEY_LOCAL_MACHINE\SOFTWARE\Microsoft\Windows NT\CurrentVersion\Fonts
- Click FILE > EXPORT and save the file as some name you like
- Open the resulting .REG file with Notepad and remove all references to other fonts
2 – Use the Freeware Version of Advanced Installer to Build and .MSI
- Download and install the freeware version of Advanced Installer then start it
- Select NEW > INSTALLER > scroll down in the right window and select SIMPLE, then click the CREATE PROJECT button
- Enter a PRODUCT NAME and a COMPANY NAME if you wish
- Scroll down and select the DISABLE MODIFY check box – this is not required but might confuse users if it is left on
- From the left menu select INSTALL PARAMTERS and select the LIMIT TO BASIC USER INTERFACE checkbox
- From the left menu select FILES AND FOLDERS and expand TARGET COMPUTER > WINDOWS VOLUME > WINDOWS > FONTS
- From the top menu select FILES and select the fonts files
- From the left menu select REGISTRY and expand TARGET COMPUTER >HKEY_LOCAL_MACHINE > SOFTWARE > MICROSOFT > WINDOWS NT > CURRENT VERSION > FONTS
- From the top menu select IMPORT REG and point to the REG file you created in the GET REGISTRY SETTINGS section above
- From the top menu select FILE > SAVE AS and name your project what you like
- From the top menu select HOME tab, select BUILD and name your .MSI what you like
3 – Deploy Your Fonts Using Group Policy
- Copy the .MSI from step 11 above to a place on the network that all computers have access
- On your Windows Server, open your GROUP POLICY MANAGEMENT CONSOLE
- Expand the OU containing the COMPUTERS (not Users) you want to install the fonts on
- Right click and select CREATE NEW GPO then name it as you wish
- Right click on that GPO and select EDIT
- Expand COMPUTER CONFIGURATION > POLICIES SOFTWARE SETTINGS
- Right click on SOFTWARE INSTALLATION and select NEW > PACKAGE
- Point to the .MSI that contains your fonts and make doubly sure that you are using a UNC path (no drive letters!) and that all the PC’s can see that path.
- Wait for GPO to be applied (or run a GPUPDATE /FORCE if you can’t wait)
- Reboot
- have a nice day!
Much of these instructions were inspired by THIS article which is older but contains screen shots of the Advanced Installer tool that you might find handy.

No Comments